Planting Ranunculus Corms in February – Zone 7
If you are looking for a planting guide that will show you when to plant ranunculus in Zone 7, look no further! In this blog post, we will provide you with all the information you need to get your garden started. Ranunculus is a beautiful flower that can be planted in the early spring. If you live in Zone 7, February is the perfect time to get planting!
Disclosure: Some of the links below are affiliate links, meaning, at no additional cost to you, I will earn a commission if you click through and make a purchase.
What are Ranunculus?
Ranunculus are often referred to as a bulb but they occur as a corm. They grow best in regions with mild winters and long, cool springs. In zones 7 or higher fall is the ideal planting time outside. Those with colder winters (zones 6 and lower) can plant in late winter – early spring. No matter your zone you want to make sure your Ranunculus don’t freeze. So keeping them under frost cloth or in a hoop house is ideal.
We buy all of our Ranunculus Corms from Easy to Grow Bulbs!!
When to Plant Ranunculus
When to plant ranunculus depends on where you live and what kind of setup you have. You can plant your ranunculus corms in either autumn or late winter/early, in full sun. If you live in an area that has mild winter temperatures (zone 7 and above), corms can be planted in autumn and successfully overwintered outdoors with protection from a low tunnel or frost cloth.
In colder areas (zones 6 and below), ranunculus must be grown in a minimally heated hoop house or planted outside at the end of winter/early spring. For ALL zones you DO NOT want to expose your corms to temperatures below 25 degrees Fahrenheit, they will freeze and ultimately rot once thawed.
Be sure to protect them from extremely cold temperatures. We use mini hoop houses (hoops and frost cloth) to protect ours.
Before Planting
When you are ready to plant your ranunculus corms you want to soak them for 3 to 4 hours in room temperature water. It’s important that you don’t over soak them; otherwise they will rot. So set a timer. As the corms soak, they will double in size looking like little octopus!
After soaking, corms can either be planted directly into the ground or pre-sprouted. Pre-sprotuing the corms before planting will mean your flowers will bloom a few weeks earlier.
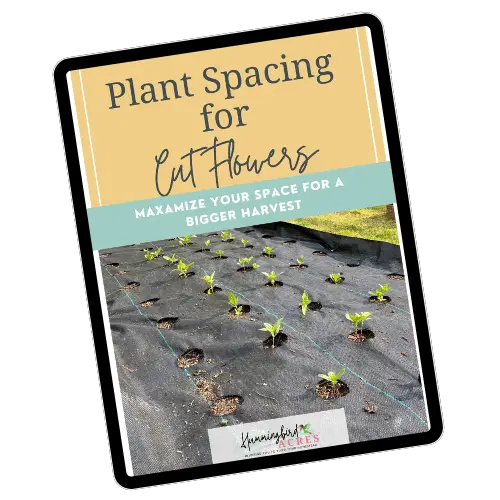
Grab my free Ebook
Plant Spacing for Cut Flowers Guide
Planting more in a smaller space = a BIGGER Harvest
Presprouting
To pre sprout your ranunculus corms fill a flat-bottom seed tray half full of moist potting soil. Arrange the soaked corms onto the soil, and cover them with more soil so that they are completely covered.
Leave the tray in a cool place (40 – 50 degrees F) for 10 to 14 days. Make sure you you put them in a place where rodents can’t find them. We put ours in the basement under grow lights because it is really cold down there.
Check your corms every few days, making sure the soil is moist but not soggy, and remove andy corms that show signs of mold and/or rot.
The corms will develop little white rootlets that resemble hair. Once rootlets appear, it’s time to plant them in the ground.
Preparing the Garden
While you are waiting for your corms to “sprout” get you garden space ready by adding a generous dose of compost and a balanced organic fertilizer. Make sure you mix it well.
If frost is still a possibility make sure you have your hoops and frost cloth on hand.
Planting Ranunculus
Plant your corms outside every 9 inches apart and about 2-3 inches deep. Make sure you plant the corms with the “octopus tentacles” pointing down. Check out Planting Ranunculus | Where, When, How for more details.
We plant ours in landscaping mesh to help with the weeds. Learn more about using landscape mesh in your cut flower garden HERE.
Caring For your Baby Ranunculus
Once your ranunculus plants have been planted, it is important to water them regularly. Make sure the soil is moist at all times, but do not overwater. Ranunculus also need plenty of sunlight in order to grow and bloom. If you are planting them outdoors, make sure they are in a location that gets plenty of direct sunlight. Fertilizing your plants once a month will also help them to grow and bloom beautifully.
During cold stretches, when temps dip below freezing, cover your plants with a layer of frost cloth. Autumn-planted corms will bloom in early spring, and late winter/early spring planted corms will flower by mid-spring.
How to Store Ranunculus Corms
It is important to save ranunculus bulbs over winter in areas prone to any freezing, as they are extremely sensitive and will not survive much more than a light frost. Fortunately, it is a simple task that you just have to remember to do before that cold weather threatens.
Once temperatures get into the 80’s F, ranunculus will start going dormant. Flowers will start to die and leaves will start to yellow and dry. Once the leaves have completely yellowed, it’s time to dig corms. After you have dug them up cut off the leaves and allow the tubers to dry completely for several days, either indoors in a warm low humidity room, or simply out in the sun.
Your corms can be stored in the bags they arrived in. Keep them in a cool, dry place until you are ready to plant them again next season.
Some gardeners (zones 7 or above), can leave your corms in the ground and they may bloom the following year depending on multiple factors, such as how cold your winter is, how well your soil drains, and how much pest pressure you have in your garden.

Ranunculus as Cut Flowers
Ranunculus have an outstanding vase life, often exceeding 10 days. You want to cut the buds that are colored and squishy like marshmallows, but not yet fully open, for a vase life of 10 to 12 days.
If the blooms are open when cut, they’ll still last a week but will be more fragile to transport. Make sure you are cutting spend flowers down to the base to promote new blooms.
Here are some suggestions that will help you take care of your ranunculus.
1. Remove all the leaves from the bottom of the stems, make sure that none of the leaves are touching the water. If leaves get in the water, it can cause the water to fill with bacteria which can affect the vase life of your ranunculus. Keep in mind that you want only to take off what you need to take off, so 3-4 inches of “luke-warm” water at the bottom of the vase is just fine (no need to fill her to the top)
2. Cut about one inch of the bottom on a diagonal to make it easier for the flower to draw up water. Use floral shears or a sharp knife, something that is not sharp enough will damage the stem and make the vase life decrease!
3. Give them floral food or put a small amount of sugar in the water to liven them up. Make sure they are in a cool place out of direct sunlight.
4. Make sure to change their water every other day!
Ranunculus are a great addition to any garden and can be used in many different ways. If you want to start growing your own cut flowers, we have a course that will teach you everything you need to know. In The Cutting Garden Course, we cover all the basics of planting and caring for cut flowers, so you can enjoy their beauty in your home year after year. Enroll now and get started on your new gardening adventure!
You may also enjoy these related articles:
- Planting Ranunculus | Where, When, How
- How to Start a Cut Flower Garden
- Growing in Landscape Mesh for a No Weed Garden
- Planting Daffodils
- Starting Seeds Indoors
Did you enjoy this article? Want to hear more? Stay in touch! Sign up below to receive weekly tips and inspiration for your homestead.