Cinnamon Ornaments
Making Cinnamon Ornaments are a perfect holiday fun activity for kids. The ornaments are easy to make and their aroma lasts long after the holidays are over.
They’re meant to look like gingerbread, but unlike the regular cookie version with sugar and butter and eggs and all that perishable stuff, these ornaments are made from only three ingredients—ground cinnamon, unsweetened applesauce, and craft glue—which helps them last for ages. You mix it all together into a dough, cut it out just like regular cookies, dry, decorate, and hang. And you have a bunch of amazing smelling ornaments that will last for years and years!
Making these is a super fun project with kids (keep in mind: although the dough isn’t toxic, it also isn’t edible, and keeping little fingers from nibbling might be tricky—you can leave out the craft glue if you want).
Disclosure: As an Amazon affiliate, I earn from qualifying purchases at no extra cost to you. My blog contains other affiliate links as well for your convenience. To learn more, you may read my Disclosure Policy. Thank you for supporting my blog!
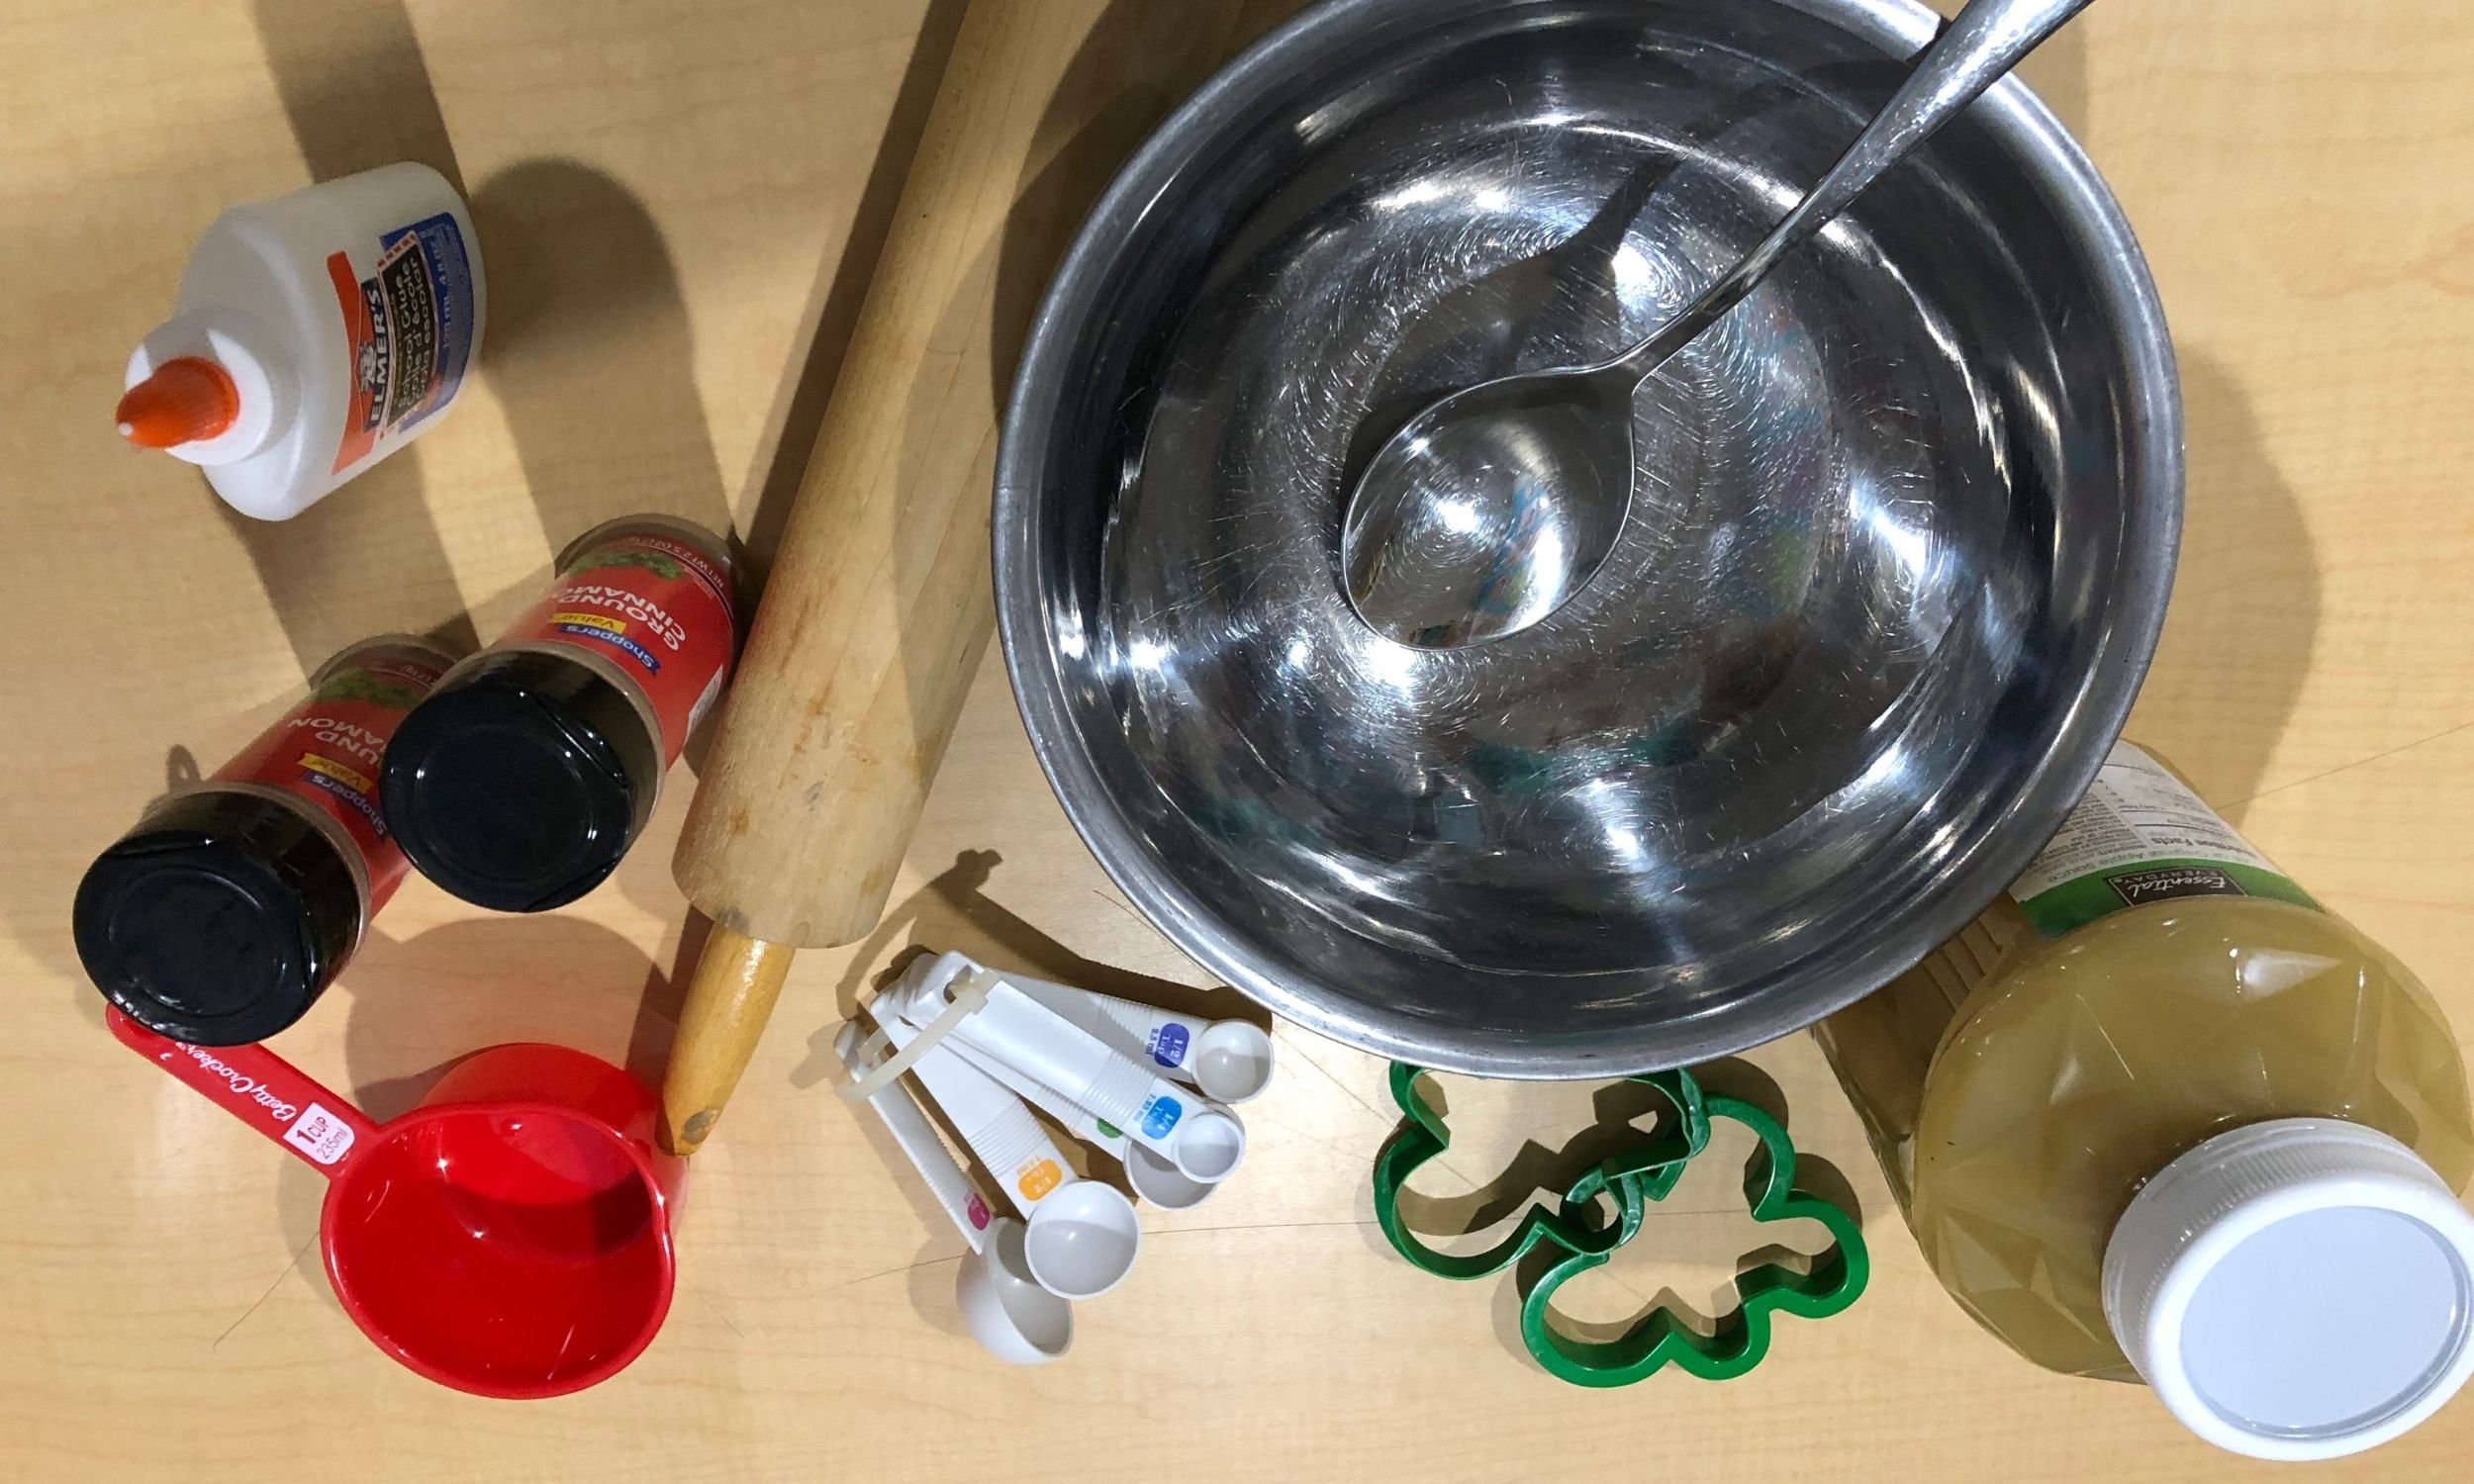
What You Will Need
- 3/4 cup applesauce
- 2 bottles (2.37 oz. each) ground cinnamon (look for the cheap, off-brand stuff– you aren’t gonna eat it)
- 2 tablespoons craft glue
- Mixing bowl
- Drinking straw
- Plastic wrap
- Rolling pin
- Baking racks and baking sheets
- Cookie cutters (our gingerbread man)
- Sandpaper
- Oven, food dehydrator, or just an out-of-the-way spot (for drying)
- Glitter, puffy paints, rhinestones, etc. for decorating, optional
- Ribbon or hooks for hanging
To Make the Dough-
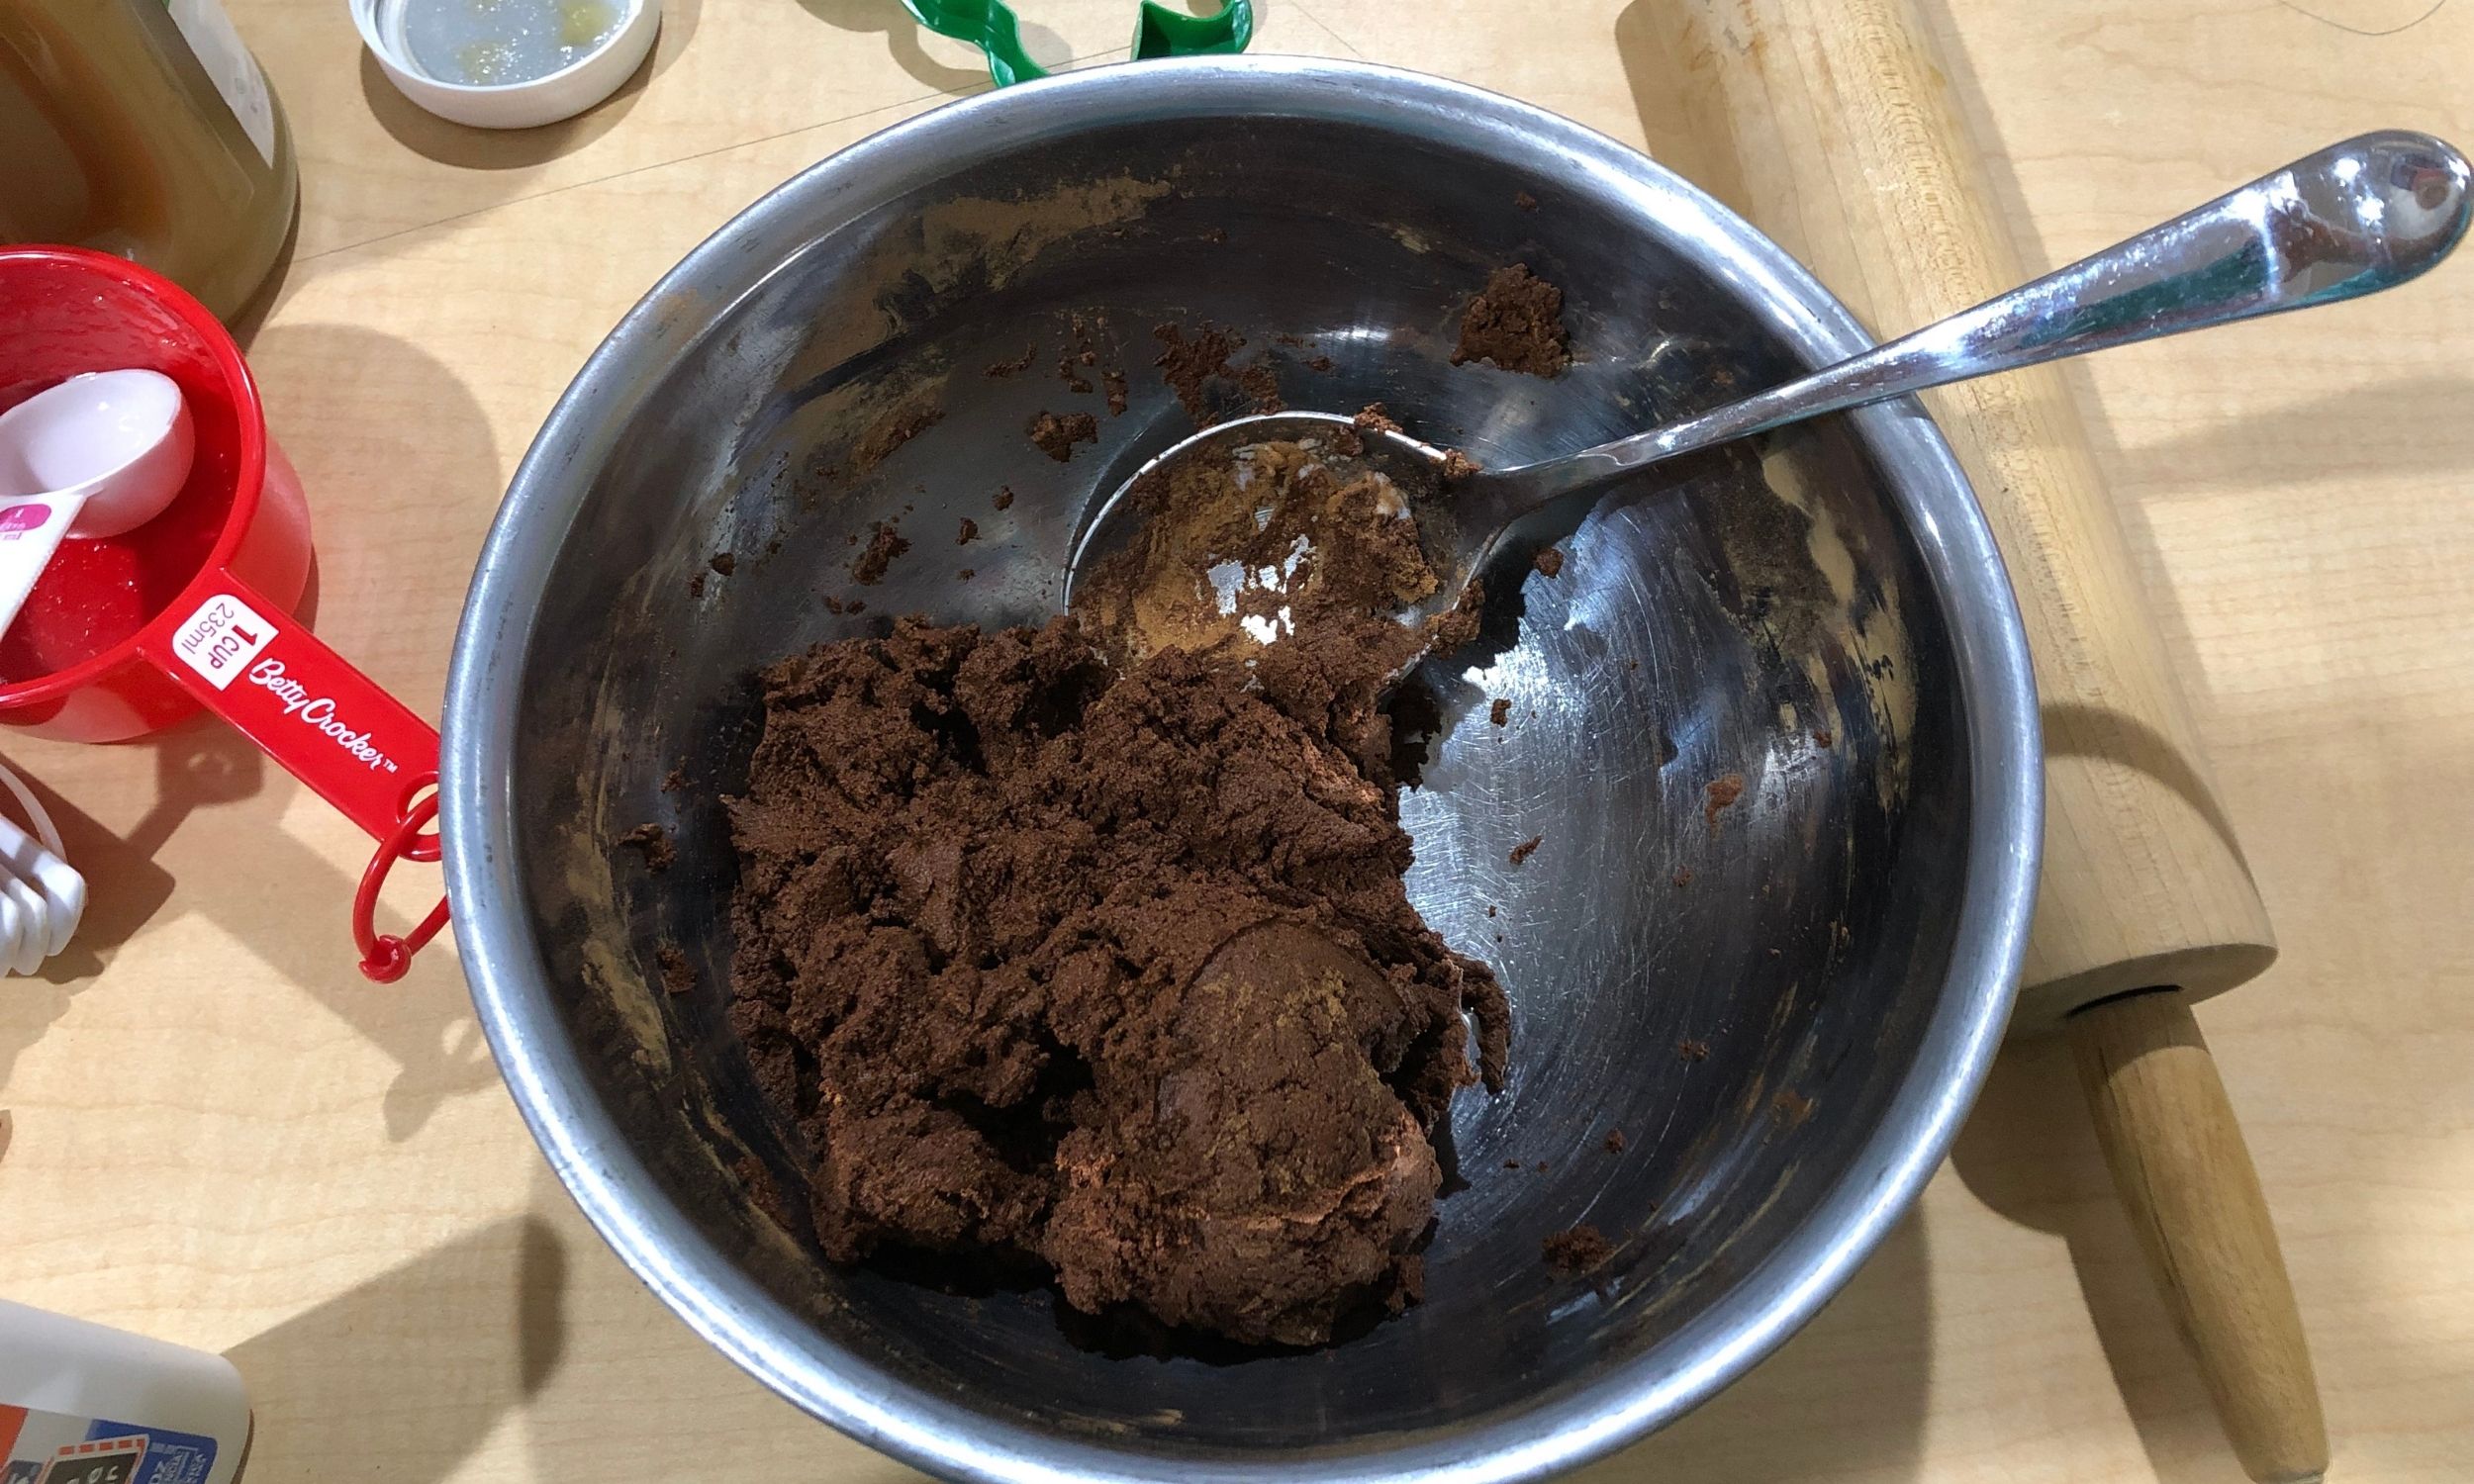
First step: Mix the applesauce, cinnamon, and glue in a mixing bowl.
And then dig in there with your hands to get it all mixed in.
Depending on a number of factors (wetness of applesauce, humidity, etc.), you might need to add more applesauce or more cinnamon to make the dough come together. You want it to be just a touch dry (because it’ll dry faster), but you also want it to hold together enough to roll and cut.
When you can form it into a big ole ball, you’re done mixing.
Now it’s time to roll. To keep things clean and easy, I just take a hunk of dough (maybe 1/3 of the whole ball) and place it between two sheets of plastic wrap.
Now roll. You’re looking for a thickness between 1/3″ and 1/2″. The thinner you go, the quicker it will dry and the more ornaments you can get out of a batch, but it also makes them more fragile and less likely to last from year to year. They also tend to curl the thinner they are. I prefer thicker ornament.
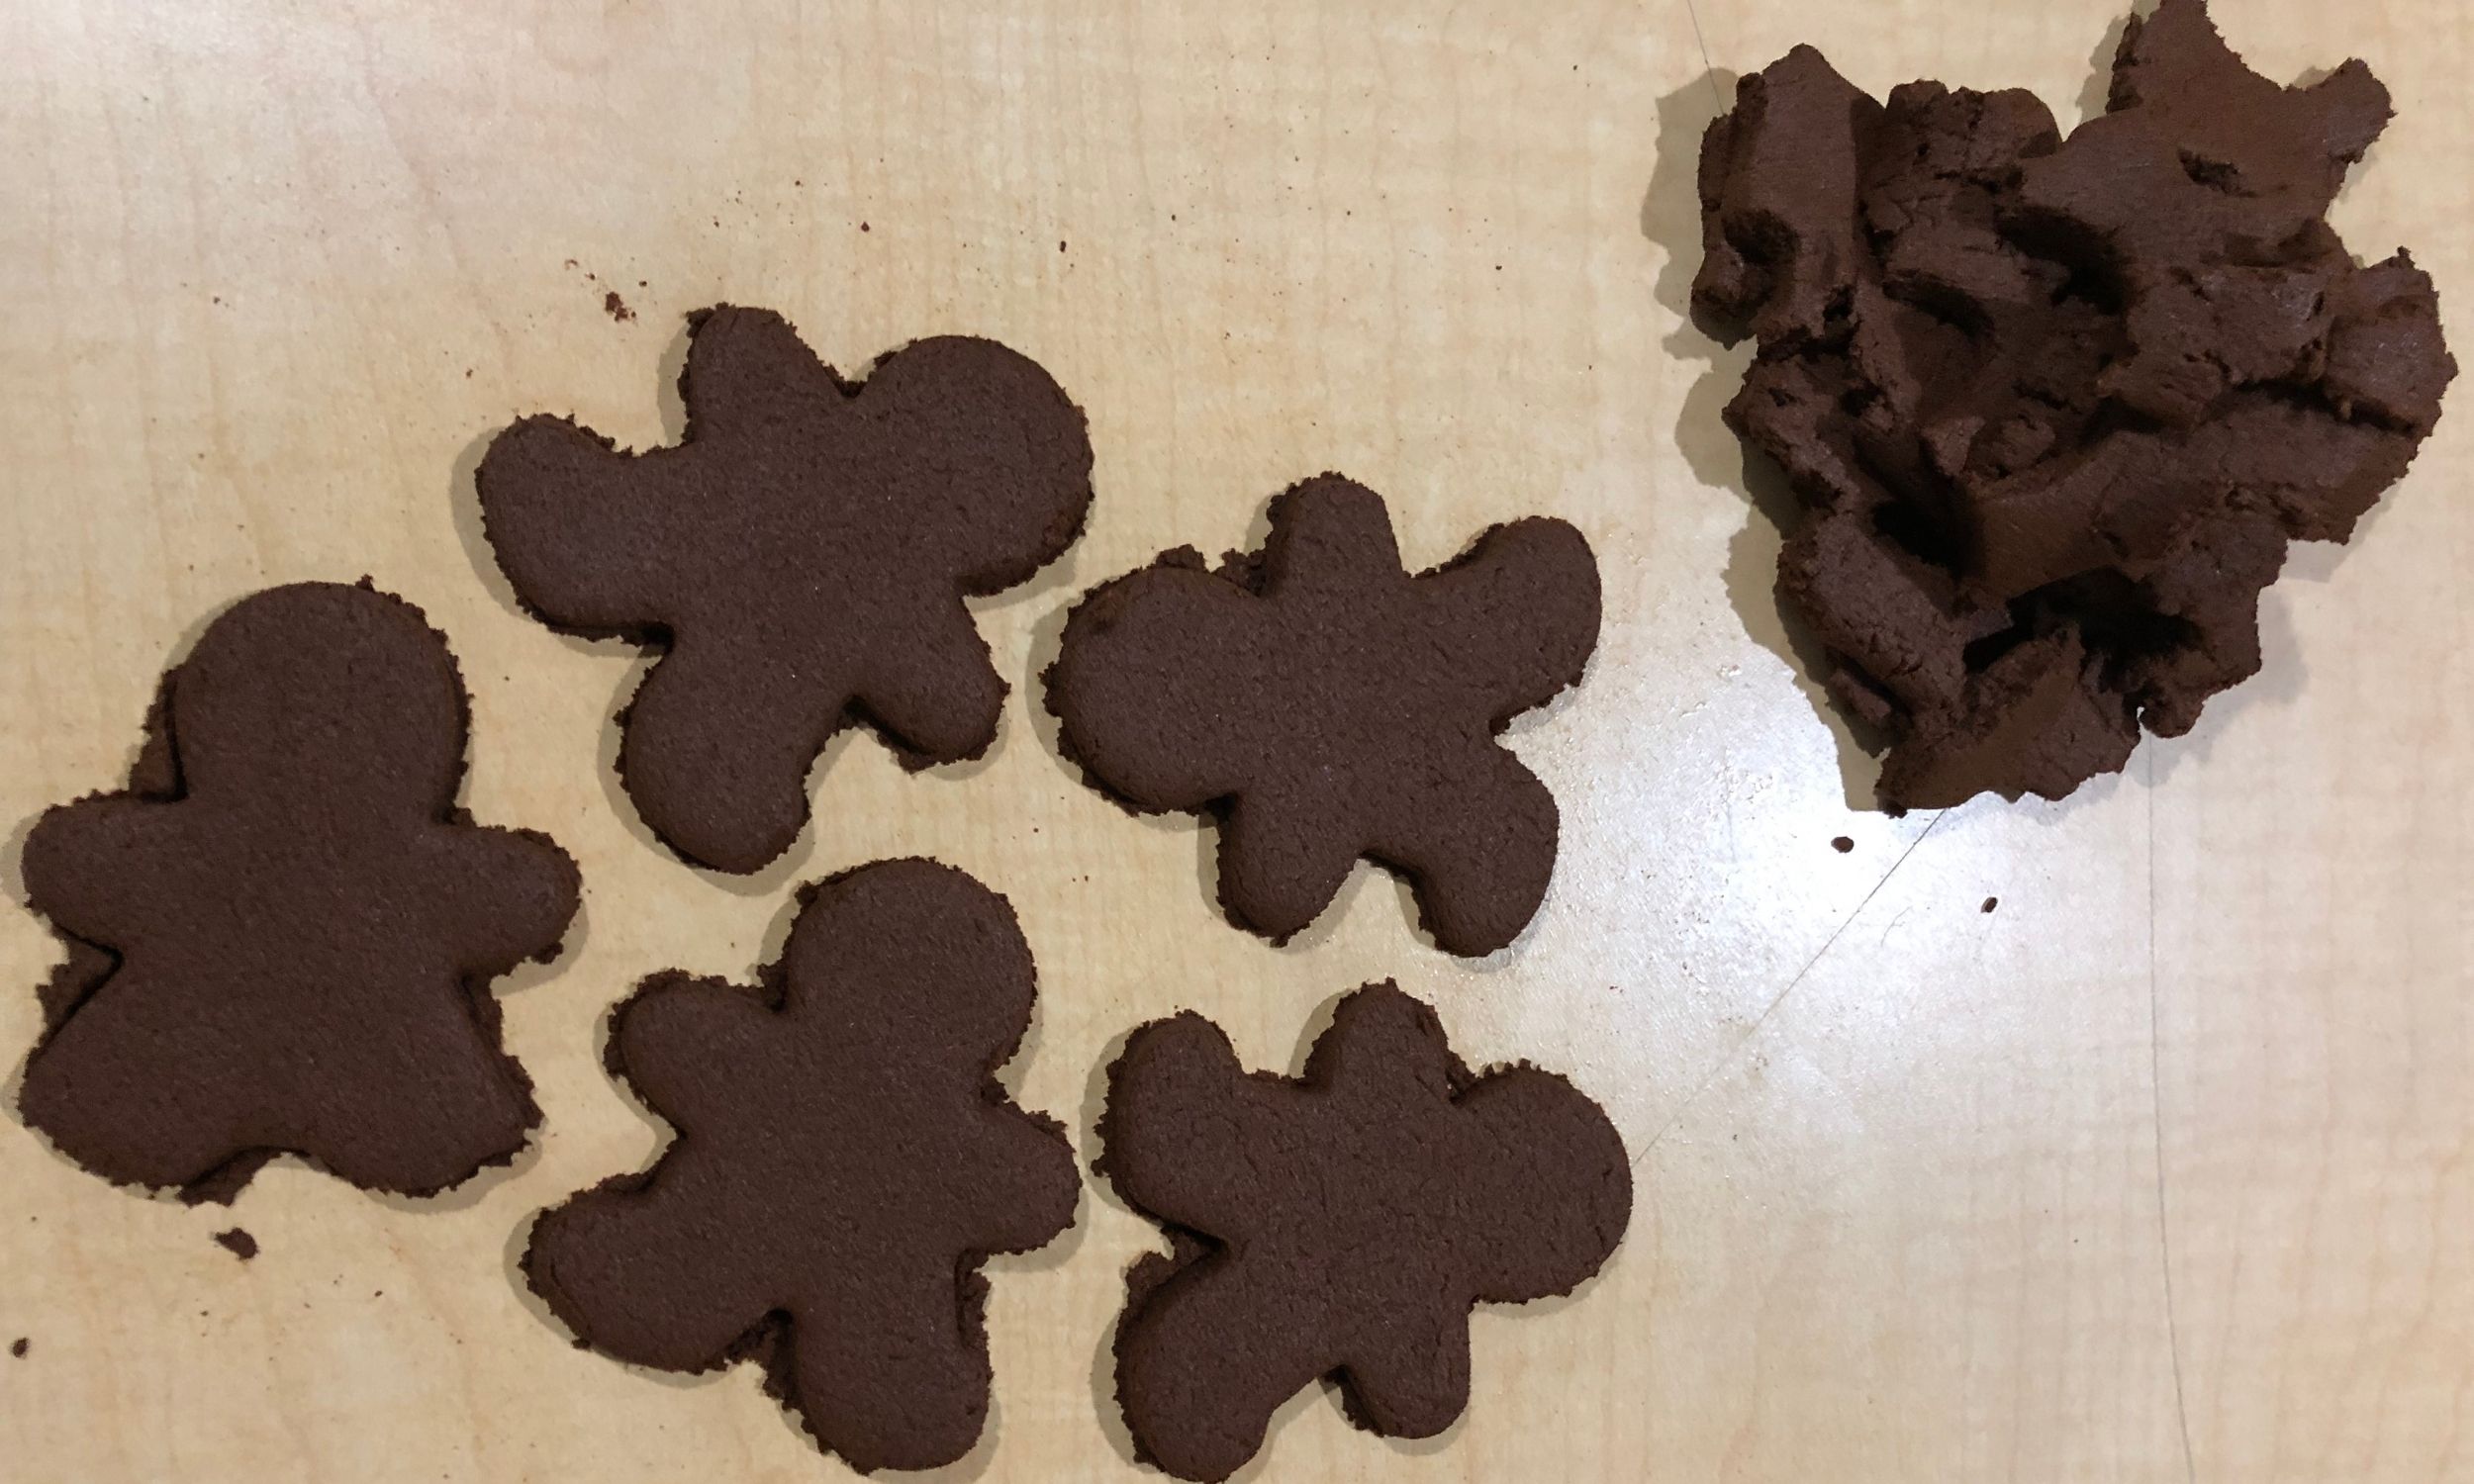
Remove the top layer of plastic wrap (set it aside to use on the next batch of dough), and then go at it with your cookie cutters.
Before you transfer your ornaments to baking racks, take the straw and poke holes where you want them to hang from.
Once all the ornaments are cut out, they go onto a baking rack on a cookie sheet, if you want to bake them to dry them.
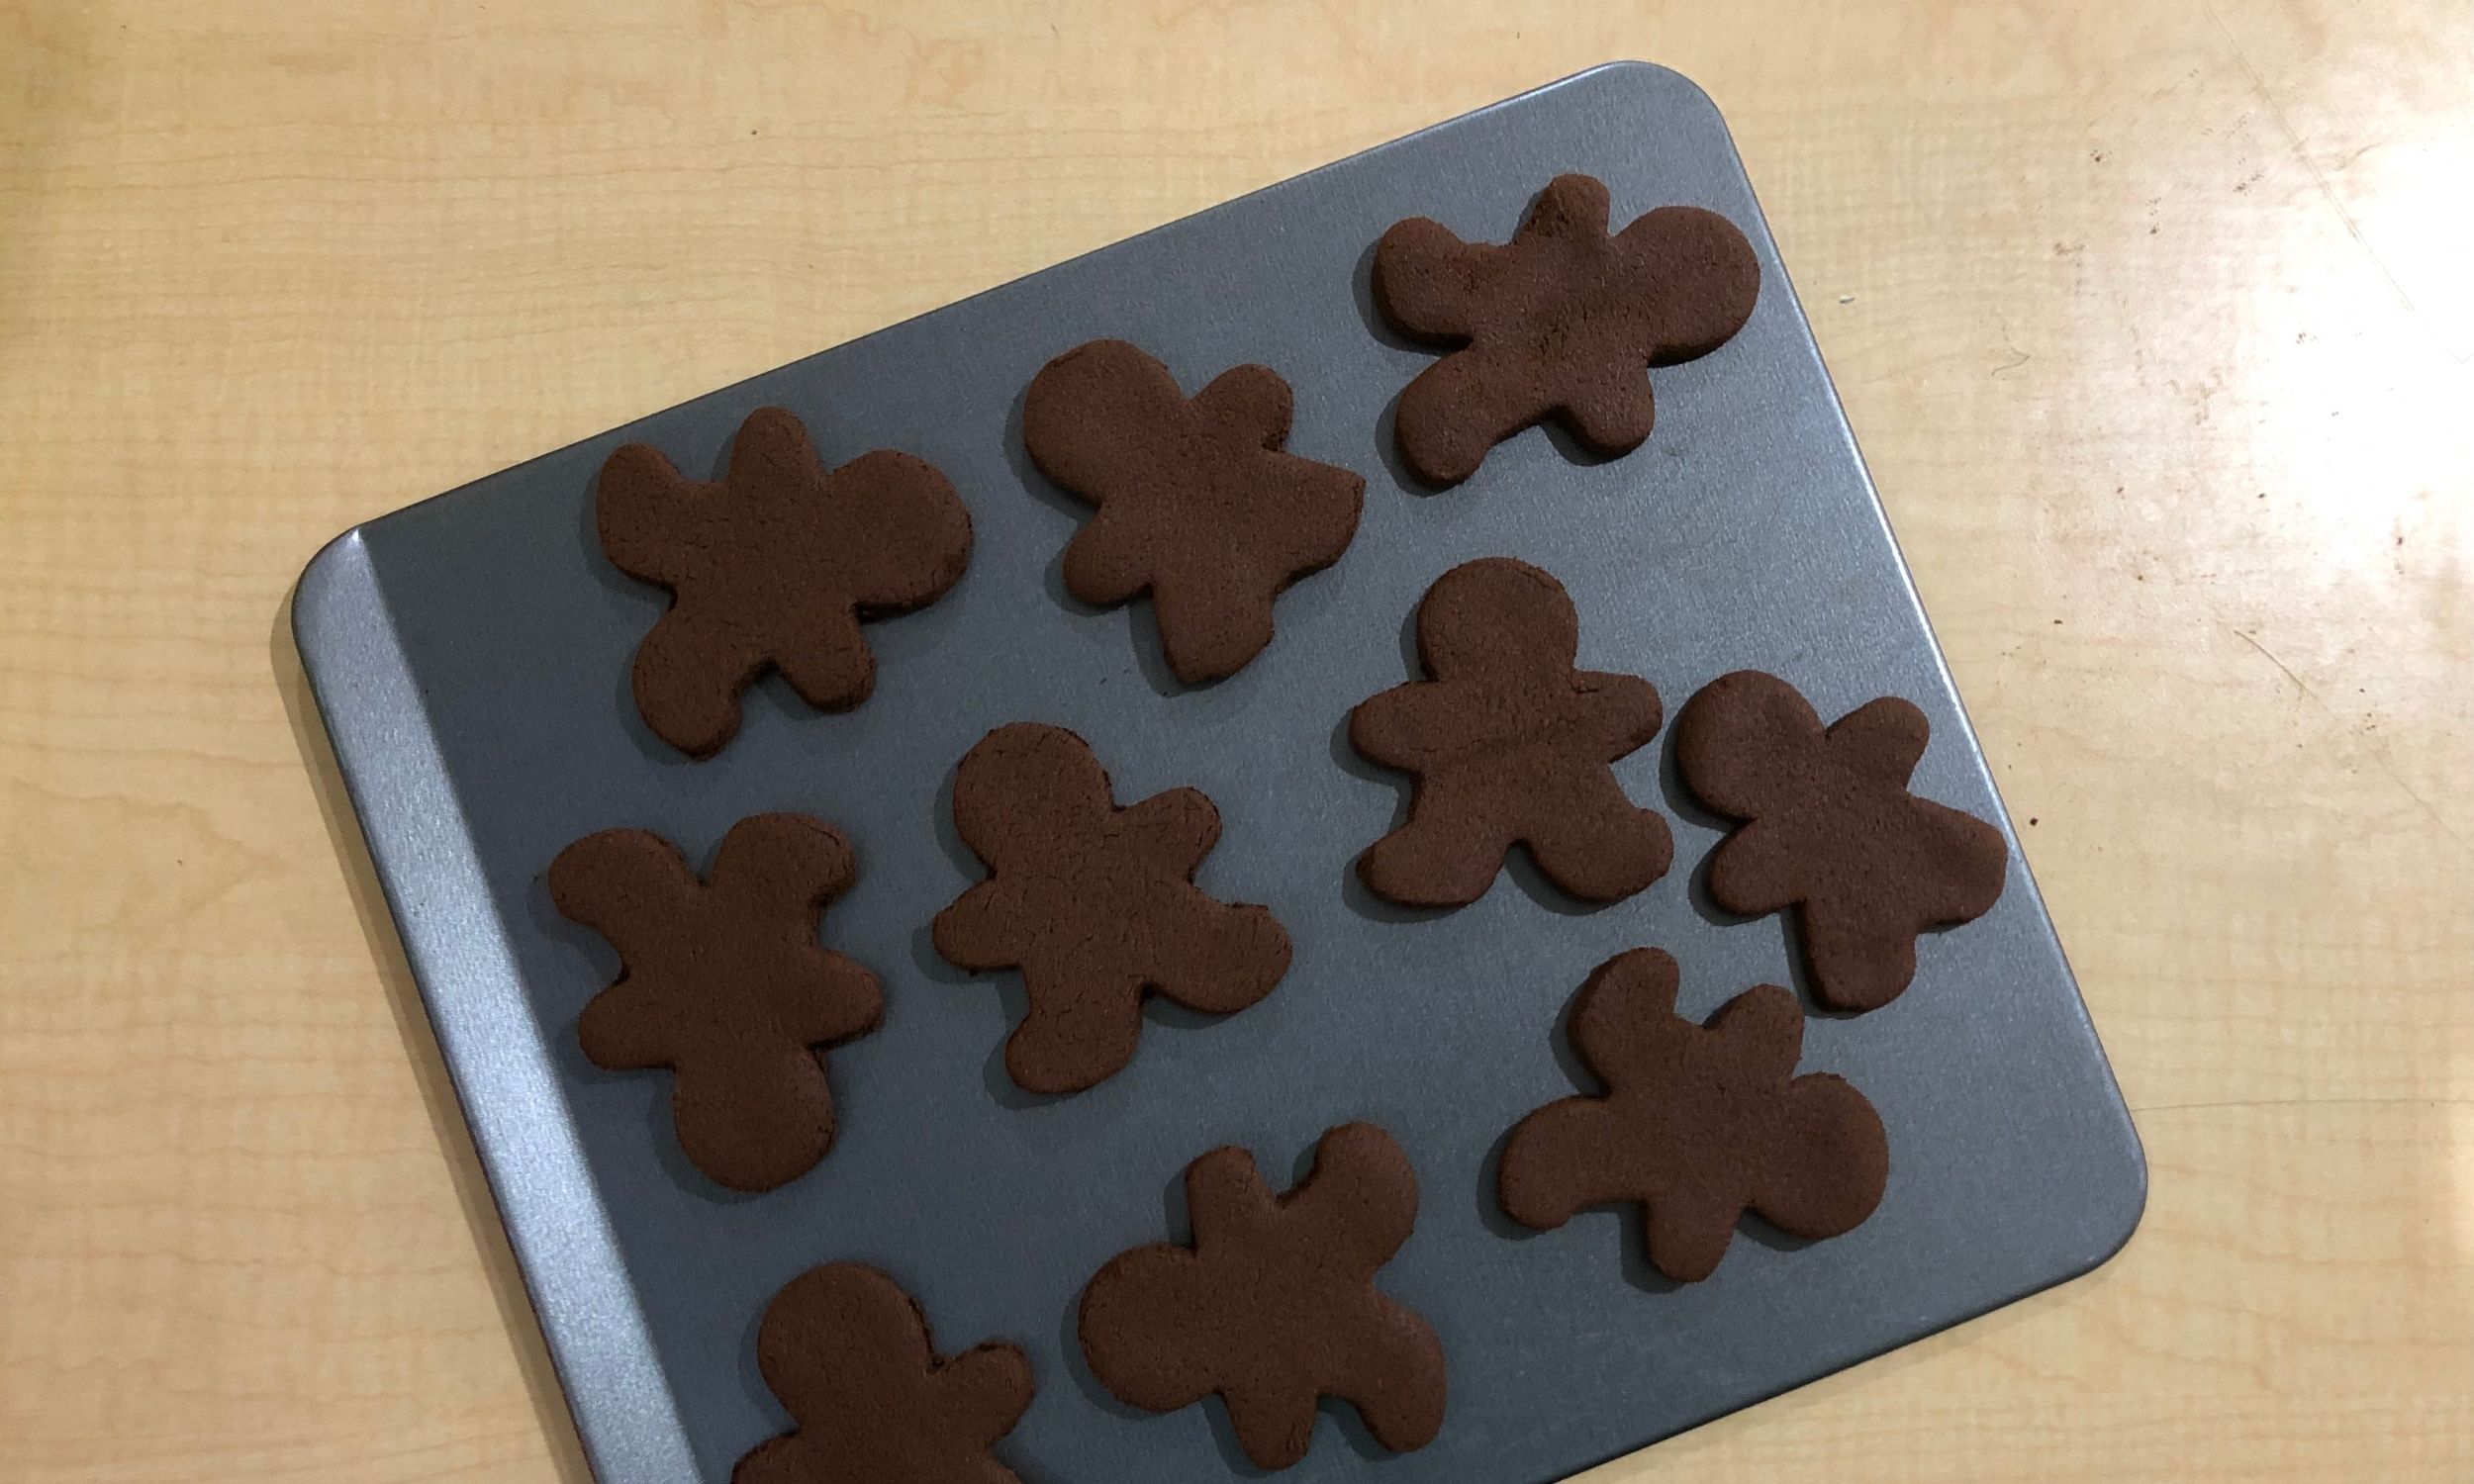
There are three methods that work for drying the ornaments:
- Baking: Pop the ornaments on a baking rack on top of a baking sheet in a 200°F oven for about 2 1/2 hours, until the ornaments are dry and hard. This is the fastest method, but it also results in a little bit of curling and bubbling.
- Food Dehydrator: Place the ornaments on the racks of a food dehydrator, and dry at the highest setting for about 6 hours.
- Air Dry: You can just put these ornaments on baking racks and dry them in an out-of-the-way place. This method takes a few days, and obviously works best in dry climates (I wouldn’t try this method at the beach house in Florida). We can get our ornaments dry in about three days on top of the fridge.
I’m usually pretty impatient, so we almost always bake them.
Decortating
Let them cool out of the oven, and then you can start decorating. Or, if you prefer, you can just tie a pretty ribbon through the hole now and hang them.
Notes-
- If you notice that the edges of the ornaments look a little rough. Nothing a quick buff with fine-grit sandpaper won’t cure.
- This recipe makes about 20 or so medium-sized ornaments.
- Write the year on the back with a Sharpie. Because it’s always nice to know when something handmade was made.
You may also enjoy these related articles:
- 10 Must Have Homestead Tools
- 10 Essential Tools for Homesteading Success – Don’t Miss Out!
- Plan Your Own Butterfly Garden: A Beginner’s Guide
Did you enjoy this article? Want to hear more? Stay in touch! Sign up below to receive weekly tips and inspiration for your homestead.