Perfect Sourdough Bread: Tips and Tricks for Achieving the Perfect Loaf
If you’re a fan of bread, you’ve likely heard of sourdough. Sourdough bread is a unique type of bread that is created through a natural fermentation process involving suitable bacteria and wild yeasts in the environment. This process results in a tangy, chewy bread that is beloved by many.
Making perfect sourdough bread can be a bit of a challenge, but once you get the hang of it, the results are well worth the effort. To create the perfect loaf, you’ll need to pay close attention to every step of the process, from mixing the ingredients to baking the bread. With practice and patience, you’ll be able to create sourdough bread that is just as good (if not better!) than what you can buy at a bakery.
Disclosure: As an Amazon affiliate, I earn from qualifying purchases at no extra cost to you. My blog contains other affiliate links as well for your convenience. To learn more, you may read my Disclosure Policy. Thank you for supporting my blog!
Sourdough Starter
If you want to make the perfect sourdough bread, you need to start with a healthy and active sourdough starter. A sourdough starter is a live culture of wild yeast and bacteria that you use to leaven your bread. It is what gives sourdough bread its distinctive flavor, texture, and aroma. In this section, we will cover everything you need to know about creating and maintaining a sourdough starter.
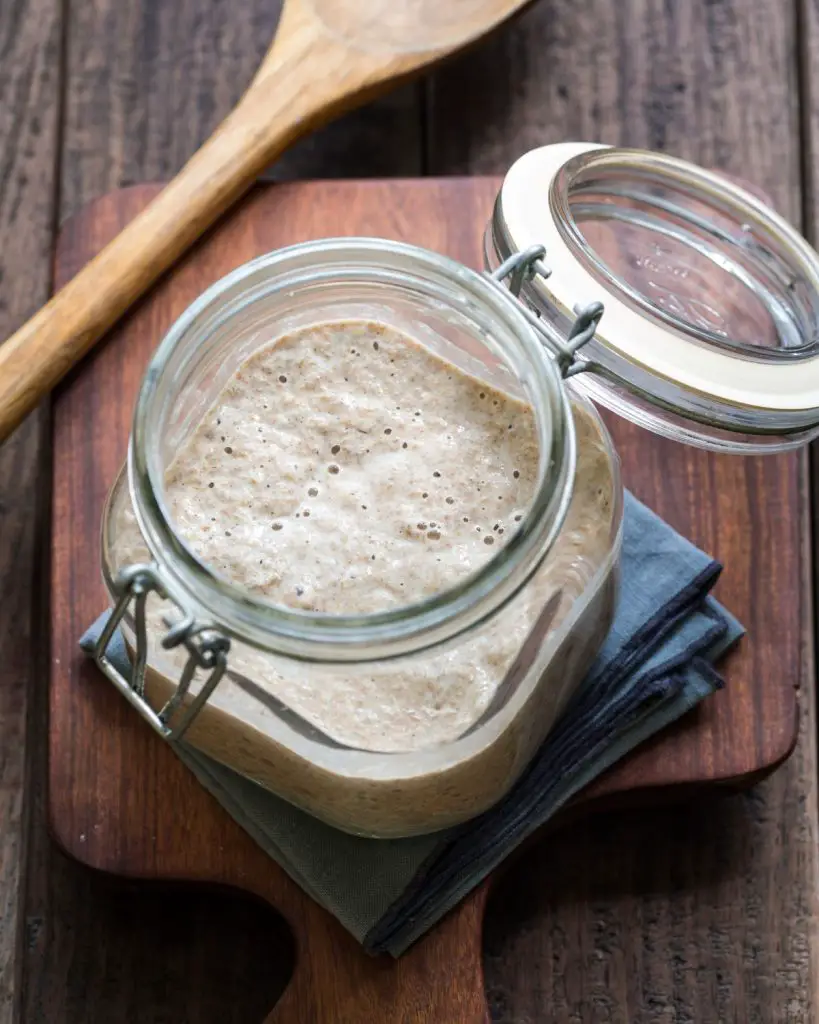
Creating a Starter
Creating a sourdough starter is easy, but it requires time and patience. You can make a sourdough starter from scratch using just flour and water. Here’s how:
- Mix equal parts of flour and water in a clean container. Use whole wheat or rye flour for best results.
- Cover the container with a cloth or lid and let it sit at room temperature for 24 hours.
- After 24 hours, discard half of the mixture and feed the remaining mixture with equal parts of flour and water.
- Repeat this process every day for 5 to 7 days until your starter is active and bubbly.
Your sourdough starter is now ready to use. You can store it in the fridge and feed it once a week to keep it alive.
Maintaining a Starter
Maintaining an active sourdough starter is crucial for making great sourdough bread. Here are some tips for maintaining your starter:
- Feed your starter regularly: You should feed your starter at least once a week to keep it alive. Use equal parts of flour and water and discard half of the mixture before feeding.
- Use a kitchen scale: Use a kitchen scale to measure your ingredients accurately. This will help you maintain the right hydration level for your starter.
- Keep your starter at the right temperature: Your starter should be kept at room temperature or in the fridge depending on how often you bake. If you bake frequently, you can keep your starter at room temperature. If you bake less often, store your starter in the fridge and feed it once a week.
- Use filtered or bottled water: Chlorinated tap water can kill the bacteria in your starter. Use filtered or bottled water to feed your starter.
By following these tips, you can maintain a healthy and active sourdough starter that will help you make the perfect sourdough bread.
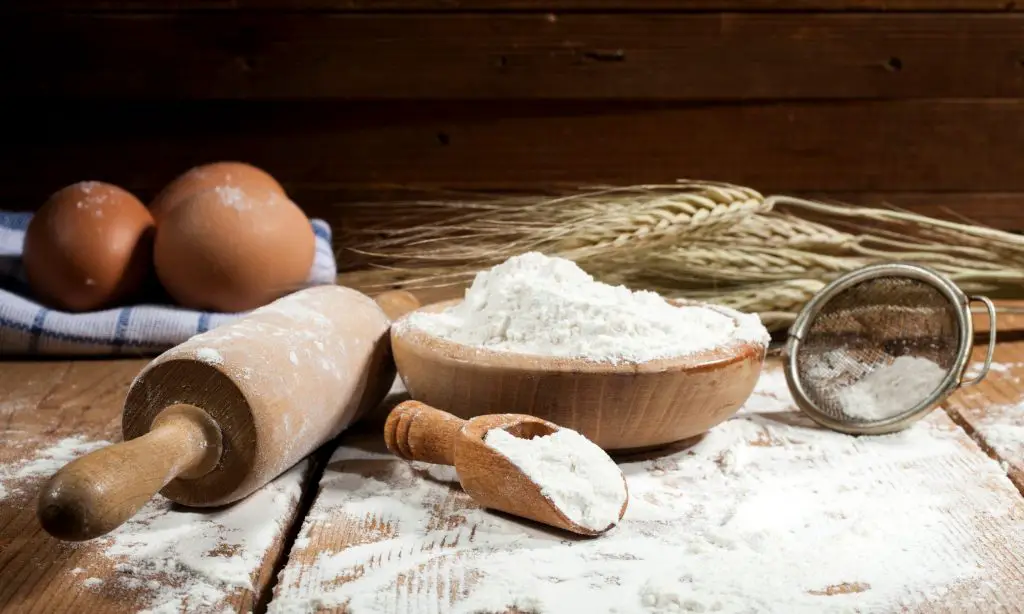
Flour Selection
When it comes to making the perfect sourdough bread, the type of flour you choose is crucial. In this section, we will discuss the different types of flour and their hydration levels.
Types of Flour
There are several types of flour that you can use for sourdough bread, including bread flour, all-purpose flour, whole wheat flour, organic flour, and pre-fermented flour.
- Bread Flour: Bread flour has a high protein content, which helps create a strong gluten network that gives the bread its structure and chewy texture. It is ideal for making sourdough bread.
- All-Purpose Flour: All-purpose flour can also be used for making sourdough bread. It has a lower protein content than bread flour, but it can still produce a good loaf.
- Whole Wheat Flour: Whole wheat flour is made from the whole wheat kernel, which gives it a nutty flavor and a slightly denser texture. It can be used on its own or mixed with other flours.
- Organic Flour: Organic flour is made from wheat that has been grown without the use of synthetic pesticides and fertilizers. It can be used in the same way as regular flour.
- Pre-Fermented Flour: Pre-fermented flour is made by soaking flour in water and allowing it to ferment for several hours or overnight. This process can help improve the flavor and texture of the bread.
Flour Hydration
The hydration level of your flour is another important factor to consider when making sourdough bread. Hydration refers to the amount of water that is added to the flour.
- High Hydration: High hydration doughs have a higher water content, which makes them more difficult to handle but can result in a lighter, airier loaf.
- Low Hydration: Low hydration doughs have a lower water content, which makes them easier to handle but can result in a denser loaf.
When selecting your flour, consider the type of bread you want to make and the hydration level you prefer. Experiment with different types of flour and hydration levels to find the perfect combination for your sourdough bread.
Mixing and Fermentation
Making perfect sourdough bread involves a few critical steps that require patience, practice, and attention to detail. Mixing and fermentation are two of the most important steps in the sourdough bread-making process. Here’s a breakdown of what you need to know to get it right.
Mixing the Dough
Mixing the dough is the first step in making sourdough bread. It’s essential to mix the ingredients thoroughly to create a cohesive dough that will rise properly. Here are some tips to keep in mind when mixing your sourdough dough:
- Mix the wet and dry ingredients until everything is evenly incorporated.
- Use a dough scraper to help incorporate the ingredients and ensure that no dry bits are left in the bowl.
- Autolyse the dough for 30 minutes before adding the salt to help develop gluten and improve the texture of the bread.
- Use a high-hydration dough to create a moist, airy crumb.
Bulk Fermentation
Bulk fermentation is the process of letting the dough rise after mixing. During this process, the yeast and bacteria in the dough consume the sugars and produce carbon dioxide, which creates bubbles in the dough. Here are some tips to keep in mind during bulk fermentation:
- Keep the dough at a consistent temperature of around 75°F (24°C) to encourage proper fermentation.
- Fold the dough every 30 minutes during the first hour to help develop gluten and distribute the yeast and bacteria evenly.
- Bulk fermentation should last between 3-4 hours, depending on the ambient environment and dough temperature.
- The dough is ready for shaping when it has increased in volume by 30-50% and has a bubbly, airy texture.
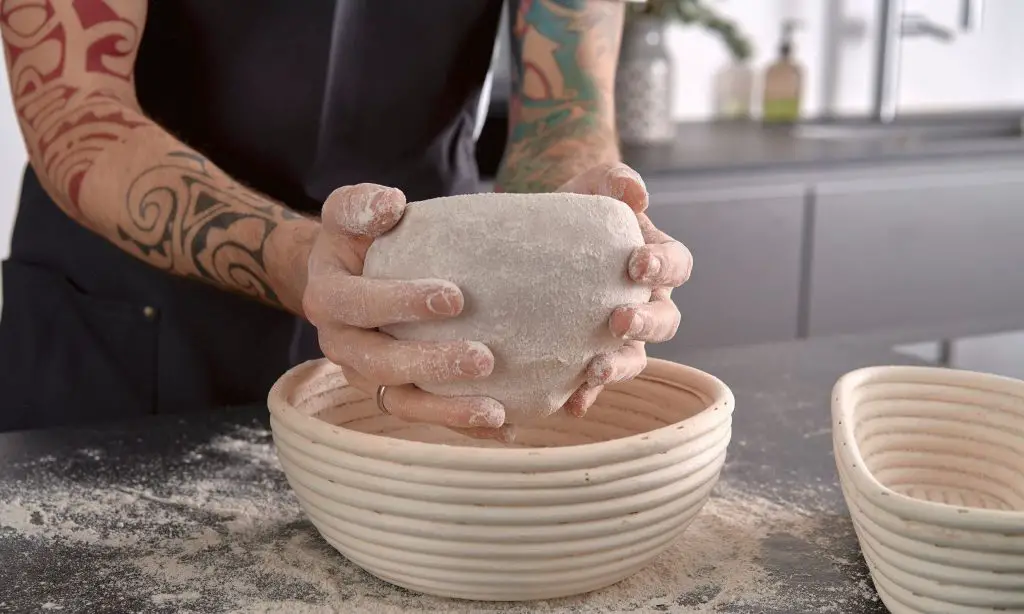
Shaping the Dough
Shaping the dough is the process of forming it into a tight ball or loaf before the final rise. Here are some tips to keep in mind when shaping your sourdough bread:
- Use a proofing basket or banneton to help shape the dough and create a beautiful pattern on the crust.
- Dust the basket with rice flour to prevent the dough from sticking.
- Gently shape the dough into a tight ball or loaf, being careful not to deflate the bubbles in the dough.
- Let the shaped dough rest for 30 minutes before the final rise.
Proofing the Dough
Proofing the dough is the final step before baking. During this process, the dough rises one last time and develops its final texture and flavor. Here are some tips to keep in mind during proofing:
- Let the dough rise at room temperature for 1-2 hours, or until it has increased in volume by 30-50%.
- Preheat your oven to 450°F (230°C) and place a Dutch oven or baking stone inside to preheat.
- Score the dough with a sharp knife or razor blade to allow it to expand during baking.
- Use a dough scraper to transfer the dough to the preheated Dutch oven or baking stone.
- Bake the bread for 30-35 minutes, or until the crust is golden brown and the internal temperature reaches 200°F (93°C).
By following these tips and techniques for mixing and fermentation, you can create a delicious, airy sourdough bread that’s sure to impress.
Get our FREE Guide
From Scratch Sourdough Starter
Are you frustrated by failed attempts at creating a perfect starter? Imagine effortlessly baking crusty, artisanal loaves that rival your favorite bakery, without the stress and disappointment. Introducing Fail Proof Sourdough Starter – the simple, proven solution to your sourdough struggles.
Enter your name & email so we can send your our FREE Guide.
Baking
Once your sourdough bread has gone through the bulk fermentation and shaping process, it’s time to bake it. Here’s what you need to know to achieve that perfect crust and open crumb.
Preparing the Oven
Preheat your oven to 450°F (230°C) for at least 45 minutes before baking. If you’re using a baking stone or Dutch oven, make sure to place it in the oven during the preheating process. This will ensure that the oven and your baking vessel are at the same temperature.
Adding Steam
To achieve a crispy crust, you need to add steam to the oven during the first few minutes of baking. You can do this by placing a baking sheet or cast iron skillet on the bottom rack of the oven and pouring a cup of hot water into it right before placing your bread in the oven. Alternatively, you can use a Dutch oven with a lid to trap the steam and create a moist environment for the bread to bake in.
Baking the Bread
Place your bread in the oven and bake for 20 minutes. After 20 minutes, remove the lid or baking sheet and continue baking for another 20-30 minutes until the crust is a deep golden brown. To ensure that your bread is fully baked, use an instant-read thermometer to check that the internal temperature has reached 200-210°F (93-99°C).
Cooling and Storing the Bread
Once your bread is fully baked, remove it from the oven and place it on a cooling rack to cool completely. Resist the urge to cut into it right away, as the bread needs time to cool and finish setting. Once it’s completely cool, store it in a paper bag or wrapped in a clean kitchen towel on the counter for up to three days. For longer storage, place it in the refrigerator for up to a week or in the freezer for up to three months.
Baking sourdough bread can be a fun and rewarding experience for both adults and kids. Not only does it produce a delicious and nutritious loaf, but it also allows you to experiment with different flours, hydration levels, and baking schedules to create your own perfect sourdough bread. With the right equipment, technique, and patience, you can become a master of sourdough baking just like Chad Robertson.
You may also enjoy these related articles:
- 7 Common Sourdough Starter Mistakes and How to Avoid Them
- Sourdough Starter: How to Create and Maintain a Healthy Culture
- Sourdough Glossary
Did you enjoy this article? Want to hear more? Stay in touch! Sign up below to receive weekly tips and inspiration for your homestead.
